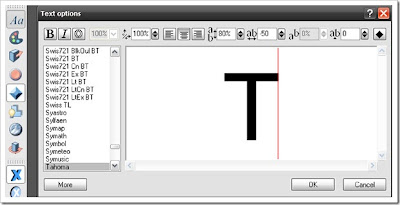
1.1.Click on the Text options, press CTRL+A to delete existing text and type T, choose font, You like and press OK.
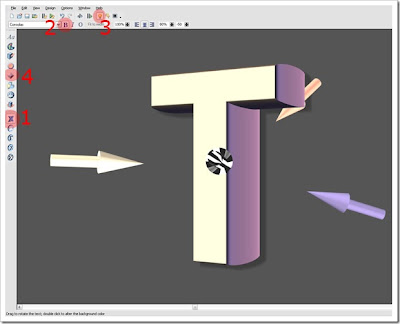
 1.2. Now we will change text a little bit -
1. Click on Text toolbar, to get off that rounded circle;
2.Click on Bold – to make text little bigger;
3.Click on Lightning to show lightning arrows;
4. Click on Bevel options to change default Bevel settings;
 1.3.
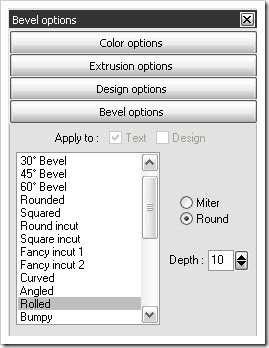
1.3.1.3.1. Change bevel shape to rolled to add little bit emboss effect;
1.3.2.Click to Round to round corners a little bit;
1.3.3. Change depth to 10 – to soften a little emboss effect;
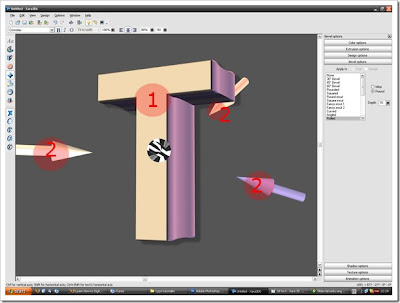
 1.4. Okay, now we will play with lightning and 3D effects.
1.4.1. Click on Text as shown and move Your mouse cursor to add any 3D effect while it is exactly as You want;
1.4.2. Click on the arrows and move them around to get glossy view and better lightning, if needed;
 1.5.Okay, We are done in XARA, now let’s export text to Photoshop:
1.5.1. Click File-Export or CTRL+SHIFT+E to get export view;
1.5.2. Choose where to save file,then do check everything like picture below, to add transparency choose *.png format and in the options click Transparent checkbox;
 Do this with every letter, change 3D effects, maybe colors – play with options until You are satisfied. I got 4 png files at the end, one for every letter – T,Y,P,E.
No comments:
Post a Comment